
REVIEW · SELF-GUIDED TOURS
Self-Guided Secrets Tour – Explore Bruges & Miss nothing
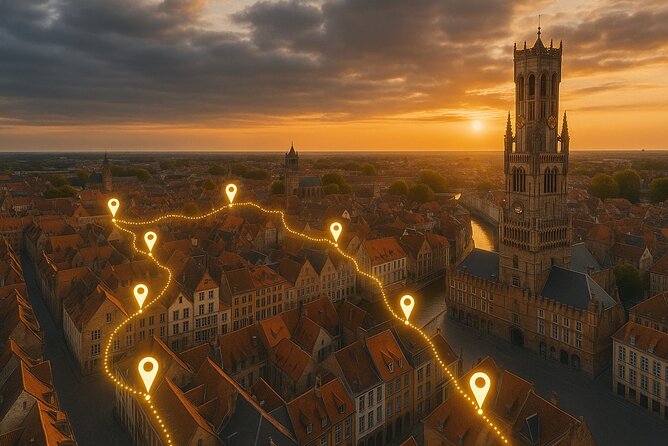
Bruges gets a whole lot easier with a smart map. This self-guided route turns your phone into a pre-pinned guide, so you can walk at your own rhythm without guessing what to see next. I like that each stop comes with context, so famous places feel more meaningful than just photo backdrops.
What I love most is the mix of big-name sights and calmer corners, all within a loop you can finish in a couple of hours or stretch out longer. You also get built-in photo moments, including rooftop viewpoints, plus suggestions for fries and Belgian beer stops.
One consideration: you need your own smartphone with Google Maps, and entrance tickets are only covered at some places. A few highlights involve extra tickets (like the brewery tasting or climbing options), so budget a little buffer if you plan to go inside every site.
In This Review
- Key things that make this Bruges tour work
- Using Google Maps as your Bruges walking companion
- Price and value: $4.82 per group can be a bargain
- Start at Concertgebouw Brugge and walk the city loop
- Stop-by-stop: what you’ll experience in Bruges
- Stop 1: Sint-Janshospitaal hospital museum and its calmer courtyards
- Stop 2: De Halve Maan Brewery, old brewing tech and a rooftop view
- Stop 3: Ten Wijngaarde Beguinage for a pause away from crowds
- Stop 4: Onze-Lieve-Vrouwekerk for the 115-meter tower and Michelangelo
- Stop 5: Rozenhoedkaai (Quai du Rosaire), the canal view everyone understands
- Stop 6: Koningin Astridpark for a green break in the city core
- Stop 7: Jan Van Eyckplein and the Hansa Quarter connections
- Stop 8: De Nieuwe Papegaai windmill on the ramparts
- Stop 9: Belfry of Bruges, steep steps and big views
- Stop 10: Sint-Salvatorskathedraal, Bruges oldest parish church
- Rooftops, secret spots, and the fries-and-beer strategy
- How long it really takes and how to pace it
- Who should book this self-guided Bruges route
- Should you book it?
- FAQ
- How long does the Self-Guided Secrets Tour take?
- How much is the tour, and is it per person?
- Do I need to pay entrance fees for the sights?
- Where does the tour start and end?
- What do I need on my phone to use the tour?
- Is the tour private for my group?
- What if I’m unhappy with the map I receive?
Key things that make this Bruges tour work
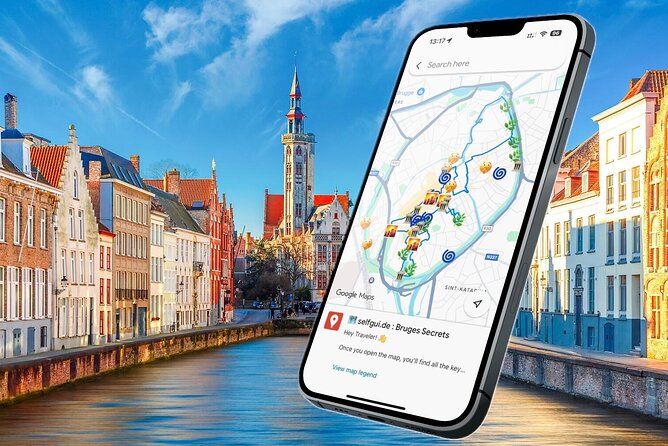
- One-click Google Maps navigation with all spots pre-pinned, so you never feel lost in medieval lanes
- Short, focused stops (often 15 to 20 minutes) that help you keep moving without rushing
- Iconic views plus quiet resets, from Rozenhoedkaai to Koningin Astridpark
- Art and architecture with specifics, including Hans Memling at Sint-Janshospitaal and Michelangelo at Onze-Lieve-Vrouwekerk
- Rooftops and secret viewpoints for better photos without extra planning
- Great value for small groups, priced per group up to 10, and only your group participates
Using Google Maps as your Bruges walking companion
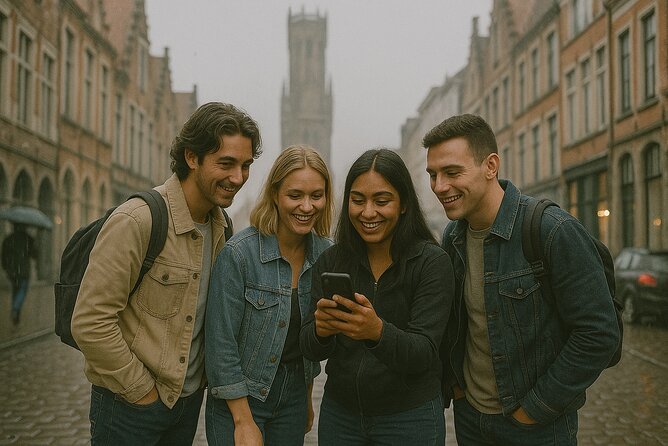
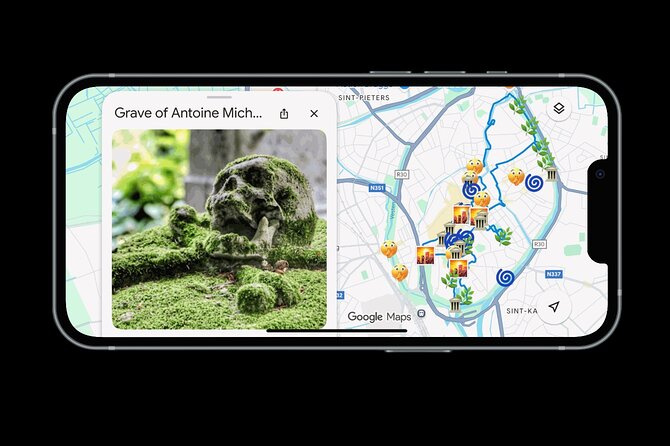
This tour is designed for people who want independence, not a rigid schedule. After payment, you get access to the official Selfgui.de map in English, and you can use it for any travel date. The “how” is the point: instead of a complicated app, you follow along using Google Maps with all stops pre-pinned.
In practical terms, that means less time checking your bearings and more time actually looking around. Bruges can be wonderfully confusing at street level, with narrow lanes that lead to squares, canals, and tiny bridges in quick succession. Having the route laid out helps you avoid the common problem of walking past something interesting and realizing too late.
Because the experience is self-guided, you also control your pace. Want to linger by the canal reflections? Go ahead. Want a quicker pass through a church? You can. Most stops are built to fit into a smooth flow, and the whole outing lands in the 2 to 4 hour range depending on how long you pause for photos and reading.
More things to do in Bruges:
- Bruges: Small Group Boat Cruise and Guided Walking Tour
★ 4.8 · 4,102 reviews - Bruges: Guided Tour & Boat Ride with Optional Beer Tasting
★ 4.4 · 3,894 reviews - Historical Walking Tour: Legends of Bruges
★ 5.0 · 2,541 reviews
Price and value: $4.82 per group can be a bargain
At $4.82 per group (up to 10 people), this is the kind of price where you are paying mostly for convenience. You are not buying a live guide with a voice and a microphone, so the value comes from the work being done for you up front: the route planning, the stop order, and the on-the-go explanations.
Here’s the balance to keep in mind. Some sights are listed with free admission tickets, but others are not included. That means the overall cost can rise if you want to enter everything or do the optional climbs and tastings. Still, even with a few extra tickets, it often remains a cost-effective way to see a lot of Bruges without hiring separate private arrangements.
Start at Concertgebouw Brugge and walk the city loop
Your tour begins and ends at Concertgebouw Brugge, ’t Zand 34 (8000 Brugge). Having a clear start and finish matters, because Bruges sightseeing can easily sprawl if you have no plan. With this route, you can treat it like a satisfying walking session that leaves you back where you started, ready to continue exploring on your own.
The opening hours listed for the overall activity are 8:00 AM to 7:00 PM, Monday through Sunday. That is useful if you plan to do it during daylight, when churches and courtyards feel more welcoming and photos come out better. Also, since most stops are outdoors-friendly and many are free to access (at least for the time you spend there), this tour tends to work well even when your plans change.
Stop-by-stop: what you’ll experience in Bruges
A few more Bruges outings worth a look
- Bruges: Choco-Story Museum with Audio Guide and Tastings
★ 4.2 · 1,825 reviews - Bruges: Guided Rickshaw Tour
★ 4.9 · 1,199 reviews - Guided boat trip and walk
★ 4.5 · 703 reviews - Bruges: Guided Walking Tour
★ 4.5 · 682 reviews
Stop 1: Sint-Janshospitaal hospital museum and its calmer courtyards
Sint-Janshospitaal is a 12th-century hospital complex, and it feels different from the typical “another museum” stop. Expect vast timbered halls, old medical tools, and a setting organized around peaceful historic courtyards.
The big draw here is the combination of Hans Memling masterpieces with a preserved pharmacy area. That pairing makes the place more than just architecture. You’re looking at how art and daily life intersected in a medical setting long before modern hospitals.
This stop is listed as free (admission ticket free) and is planned for about 20 minutes. That’s enough time to get your bearings, see the key highlights, and still enjoy the quiet atmosphere instead of rushing through.
Stop 2: De Halve Maan Brewery, old brewing tech and a rooftop view
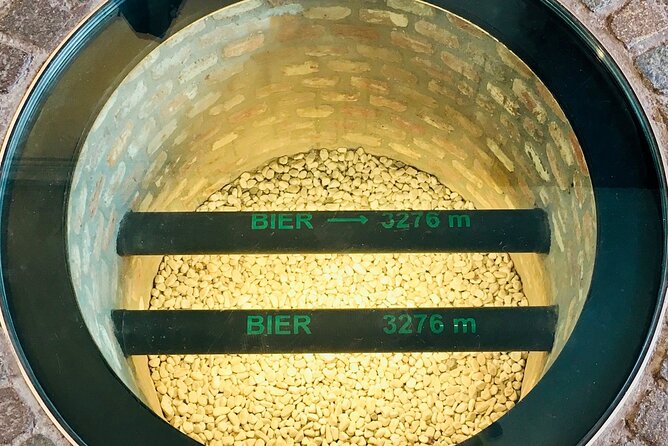
If you want a Bruges experience that smells like the city, head to Brewery De Halve Maan next. You’ll see historic brewing rooms, antique kettles, and a standout story item: a famous underground beer pipeline.
The end of the stop is the payoff for many people: a rooftop view over Bruges and a fresh beer tasting. The tour schedule keeps this around 15 minutes, which is about right because the brewery offers a strong visual and sensory hit, then it’s time to move on.
One important note: the brewery stop lists admission as not included. So treat the rooftop and tasting as optional extras that you may need to pay for separately. If you are the type who wants every included moment, plan a little time and budget for it.
Stop 3: Ten Wijngaarde Beguinage for a pause away from crowds
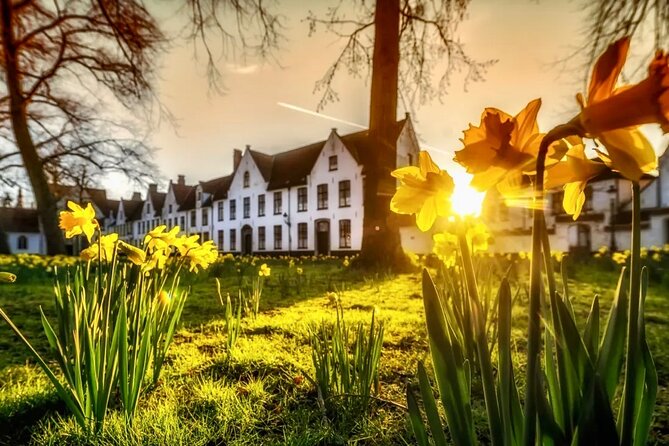
Princely Beguinage Ten Wijngaarde is where Bruges slows down. You’ll stroll among whitewashed houses and quiet courtyards, with a simple chapel and greenery framing the space. In season, the flowers and trees are part of the atmosphere, and even without perfect weather, the layout helps you feel like you’ve stepped into a separate world.
This stop is free and set for about 15 minutes. That short duration is smart. It’s long enough to appreciate the rhythm of courtyards and small details, but not so long that you get bored when the route moves back into busy streets.
Stop 4: Onze-Lieve-Vrouwekerk for the 115-meter tower and Michelangelo
Next comes one of Bruges’ main religious landmarks: Onze-Lieve-Vrouwekerk (Church of Our Lady). One of the first things you notice is the 115-meter brick tower, a defining vertical feature over the city.
Inside, the tour points you to Michelangelo’s Madonna and Child, along with Gothic chapels, centuries-old tombs, and religious artworks. The church is described as serene, which is a good match for this part of the day. You get high-impact art and architecture, then you can reset your senses before the canal views.
This stop is also marked free and planned for 20 minutes. That is a comfortable length for reading and seeing the major works without turning it into a marathon.
Stop 5: Rozenhoedkaai (Quai du Rosaire), the canal view everyone understands
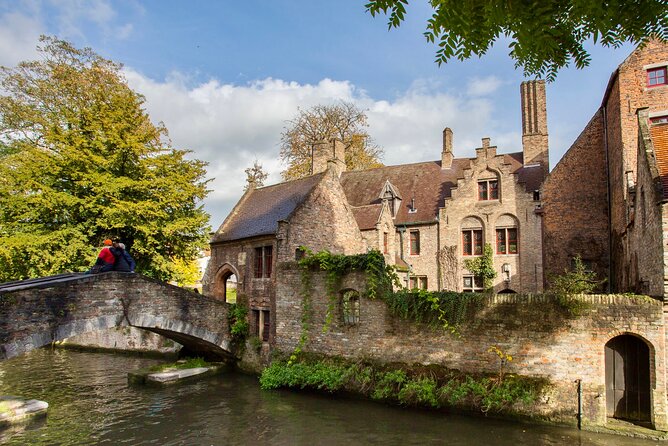
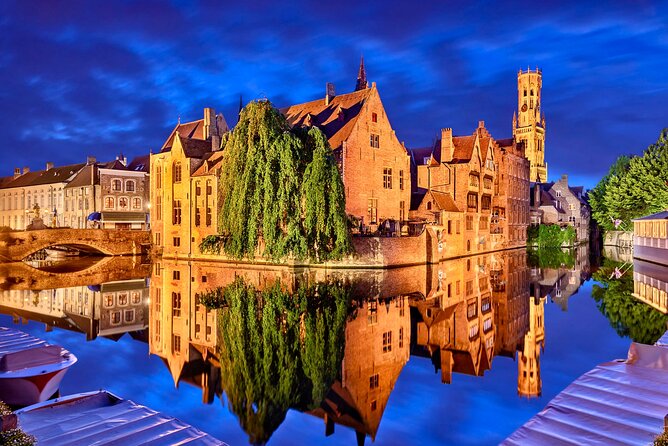
If you only needed one postcard moment to justify Bruges, Rozenhoedkaai is it. You’ll stand at the canal edge for the iconic view: medieval gabled houses reflecting in the water, swans gliding by, and historic bridges framing the scene.
This is another free stop, planned at about 20 minutes. The main “value” here is that you stop at the right angle and time window you can manage. Even if you’re not a hardcore photographer, you can still enjoy the scene as a living picture.
Practical tip: treat this as your slow-down stop. Bruges is best when you stop moving for a few minutes and let the canal do the talking.
Stop 6: Koningin Astridpark for a green break in the city core
Right after the canal, the route gives you a breather: Koningin Astridpark. It’s described as a peaceful green oasis in the heart of Bruges, and it’s named after Queen Astrid of Belgium. The park has been a public space since the 19th century, which helps explain its calm, practical layout.
Planned time is around 30 minutes, and that longer slot makes sense. Use it to rest your legs, refill water, and regroup before the final cluster of landmarks. This one is free.
Stop 7: Jan Van Eyckplein and the Hansa Quarter connections
Then you step into Jan Van Eyckplein, described as a historic jewel where trade, art, and architecture meet. In the Middle Ages, this square was the heart of the Hansa Quarter, with merchants from across Europe playing a key role in what Bruges became.
This stop is free and planned for about 30 minutes. That might sound longer than you’d expect for a square, but it works because it gives you time to look around from different corners. You can also decide how much you want to read versus just people-watch and take in the building shapes.
Stop 8: De Nieuwe Papegaai windmill on the ramparts
Now the route starts to feel slightly more “Bruges from the edges.” Windmolen De Nieuwe Papegaai is an 18th-century wooden windmill sitting on Bruges’ ramparts. The sails turning in the breeze are part of the experience, even if you don’t catch them moving at exactly the perfect moment.
This stop is about 20 minutes, and admission is listed as not included. So if you want to go inside or experience anything ticketed, you’ll need to plan for that separately. If you mainly want the exterior atmosphere and the setting, you still get a worthwhile stop without spending extra.
Stop 9: Belfry of Bruges, steep steps and big views
The route saves one of Bruges’ most famous vertical challenges for this section: the Belfry of Bruges. The tower is 13th century, and the tour includes the key experience: climb steep steps for city views.
This isn’t just about the top. The belfry area is also described as having historic bells, ancient charters, and medieval craftsmanship details. It helps connect the tower to the city’s civic life instead of making it feel like a random viewpoint.
Admission is listed as not included, and the stop is planned for 20 minutes. The biggest consideration is the climb itself. If steep steps are tough for you, you may want to decide in advance whether you will go all the way up or just enjoy what you can see from the lower areas.
Stop 10: Sint-Salvatorskathedraal, Bruges oldest parish church
Your final stop is Sint-Salvatorskathedraal (Cathedral of Saint Salvador). This is described as Bruges’ oldest parish church, with a soaring tower and a mix of Gothic and Romanesque details.
The tour also points you to religious artworks and treasures, along with medieval tombs and a collection worth pausing for. This kind of ending works well because you finish with a sense of depth, not just one more view.
This stop is free and planned at 20 minutes. If you time it right, you’ll end while you still have energy to wander independently around nearby lanes after the tour loops you back to the start.
Rooftops, secret spots, and the fries-and-beer strategy
One reason I like a self-guided format in Bruges is that it lets you follow your curiosity. This route specifically includes rooftops and secret viewpoints for stronger photo moments, plus “secret spots” aimed at Bruges-style fries and Belgian beers.
Those kinds of suggestions can be surprisingly useful because they steer you toward food moments that feel local, not just convenient. You’re not stuck searching when hunger hits or when the sky turns the kind of light you want to capture.
Also, the map can point you toward offbeat stops, such as Luc Vanlaere’s free harp museum. If you enjoy small, surprising cultural stops, that’s the sort of detail that makes a self-guided route feel smarter than a checklist.
How long it really takes and how to pace it
The tour is listed as 2 to 4 hours. In my experience with routes like this, the difference between the short and long end comes down to two things: how long you read and how long you pause for views.
If you want the quicker version, focus on the strongest visual moments first and treat museums as a “highlights only” pass. For example, you can prioritize Rozenhoedkaai, Onze-Lieve-Vrouwekerk, and the Belfry viewpoint, then fit in Sint-Janshospitaal and Ten Wijngaarde as your art and calm stops.
If you want a slower, more thoughtful outing, give extra time to the courtyard spaces and the church interiors. That’s where the self-guided format really shines, because you can linger without feeling like you are holding anyone back.
Who should book this self-guided Bruges route
This is a great fit if you:
- Want to explore without big groups and without waiting on anyone else
- Like having a plan, but still want the freedom to detour
- Prefer reading and looking at your own pace instead of listening to a live group guide
- Are traveling in a group where splitting the cost makes sense, up to 10 people
- Want a route that hits major sights and quieter pauses in one go
It may be less ideal if you strongly dislike reading from your phone or you prefer fully guided museum tours with a live docent. Also, because a few entrances are not included, you’ll need to be comfortable paying separately for those experiences.
Should you book it?
Yes, I’d book it if your goal is to see a lot of Bruges efficiently, with less stress and fewer dead ends. The value is strongest when you like independence, you want canal-and-tower highlights, and you appreciate specific art and architecture details like Hans Memling and Michelangelo’s presence at major sites.
Skip the booking only if you know you won’t use the Google Maps navigation, or if you want a strictly guided experience where everything is handled for you with no optional ticket costs.
If you are on the fence, consider this: Bruges is at its best when you move slowly enough to notice details. This tour helps you do that, without making you feel like you need to be a cartographer to get there.
FAQ
How long does the Self-Guided Secrets Tour take?
It’s listed as about 2 to 4 hours, depending on how long you spend at each stop.
How much is the tour, and is it per person?
The price is $4.82 per group, up to 10 people.
Do I need to pay entrance fees for the sights?
Some stops are listed with free admission tickets, while others are listed as admission ticket not included. Plan on paying separately for places that are marked not included if you want to go inside or do ticketed parts.
Where does the tour start and end?
The tour starts at Concertgebouw Brugge, ’t Zand 34, 8000 Brugge, Belgium, and it ends back at the same meeting point.
What do I need on my phone to use the tour?
You need Google Maps on your smartphone, since the tour uses a mobile ticket and Google Maps to show the route.
Is the tour private for my group?
Yes. It’s a private activity, so only your group participates.
What if I’m unhappy with the map I receive?
The provider states it’s a Happy-Only company and says you can email them if the map isn’t exactly what you hoped for, and they will refund you.
The latest Bruges write-ups
- 2-Hour Private Walking Tour of Bruges★ 5.0 · 13 reviews
- Explore the Instaworthy Spots of Bruges with a Local★ 5.0 · 3 reviews
- Discover Bruges while playing! Escape game – The alchemist★ 4.5 · 3 reviews
- Photo Tour “Jan van Eyck”★ 4.0 · 7 reviews
- 6 Hour Bruges Shore Excursion from Zeebrugge Cruise Port★ 4.5 · 23 reviews
- Discover the secrets of Bruges by playing!★ 4.5 · 7 reviews
- Secrets of Bruges: Walking Tour With a Chocolate and Waffle Bite★ 5.0 · 27 reviews
- Private tour: From your hotel + see the Madonna of Michelangelo★ 5.0 · 20 reviews
Self-Guided Tours, compared.
Choco-Story Museum with Audio Guide and Tastings
Read our review →
The Beer Experience Museum Entry with Audio Guide
Read our review →
Chocolate Workshop and Self-Guided Museum Visit at Choco-Story in Brussels
Read our review →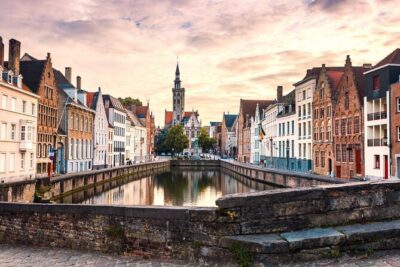
Bruges Scavenger Hunt and Highlights Self Guided Audio Tour
Read our review →
Romantic Bruges: Love Between the Canals Exploration Game
Read our review →
City Walk with Audio Guide in 7 Languages on your Phone
Read our review →
Antwerp Scavenger Hunt and Highlights Self Guided Audio Tour
Read our review →
Antwerp Scavenger Hunt and Best Landmarks Self Guided Audio Tour
Read our review →Browse the lists this tour appears in